A brochure gives you more room than a flyer to explain what your business does. It can hold a company profile, a full service menu or a step-by-step guide, and people often keep it for later reference. That makes it a useful tool for clinics, property agents, training providers, hotels and B2B companies alike.
The challenge is that a brochure has more moving parts than a single sheet. Before you start on brochure printing, you need to decide how it folds, how much content it carries and what paper suits its purpose. This guide walks through each decision.
1. Decide What the Brochure Needs to Do
A brochure handed out at a trade fair has a different job from one left at a clinic reception or posted to existing customers.
Ask yourself three questions before planning the layout:
- Who will read it, and where will they pick it up?
- What should they know or do after reading it?
- How long should it last before the information changes?
The answers shape everything else. A brochure meant for a one-day event can be lighter and simpler. A company profile that sits on a reception desk for a year needs sturdier paper and timeless content.
2. Match the Fold to How People Read
The fold controls the order in which readers see your content. Each style suits a different kind of message.
Fold
Panels
Printed pages
Best for
Bi-fold
2
4
Company profiles, service menus, event programmes
Tri-fold
3, rolled inwards
6
Mailers and product brochures that fit a DL envelope
Z-fold
3, zig-zag
6
Step-by-step guides and price lists read in order
Accordion fold
4, zig-zag
8
Maps, timetables and wide catalogues
Double gate fold
4, opening from the centre
8
Launches, invitations and premium menus
Double parallel fold
4, folded in half twice
8
Directories, reference sheets and mailers
The tri-fold is the most familiar format. An A4 sheet folds down to DL size, so it fits standard brochure racks and envelopes. A bi-fold gives you larger panels and a clean cover, which suits a company profile. A gate fold creates a reveal as the reader opens it, so it works when the opening is part of the message.
3. Plan the Content Panel by Panel
Once you have a fold, sketch where each piece of content will sit. Folding a sheet of A4 paper by hand and writing on each panel is a quick way to check the reading order.
For a standard tri-fold, a common layout is:
- Front cover: Your logo, a strong headline and one image.
- Inside panels: The main content, such as services, benefits or product details.
- Inner flap: A highlight, testimonial or special offer, since it is often the first panel seen when the brochure opens.
- Back panel: Contact details, address, map or QR code.
Keep each panel focused on one topic. If you find yourself shrinking the font to fit everything in, you may need a fold with more panels or a shorter message.
4. Choose Paper That Folds Well
Paper affects both how the brochure feels and how cleanly it folds.
- Gloss art paper (around 128 to 150 GSM) is a popular choice for colourful marketing brochures. It shows photos well and folds easily.
- Matte art paper reduces glare and makes longer text more comfortable to read.
- Art card (around 230 to 250 GSM) feels more premium and suits company profiles or menus. Heavier stock usually needs creasing before folding so the fold line does not crack.
- Textured cards such as linen give a classic, tactile feel for hotels, law firms and premium brands.
- Synthetic paper resists tearing and moisture, which helps for brochures handled often or used outdoors.
If your brochure will be posted, check the weight as well. A heavier stock can increase postage costs on large mailings.
5. Add Finishing Only Where It Helps
Lamination protects the surface and the folded edges, so it suits menus and brochures that are handled many times a day. Gloss lamination makes colours look richer, while matte lamination gives a softer, more refined look.
Foil stamping adds a metallic accent to a logo or title. Used sparingly, it can lift a premium brochure or a festive campaign. On an everyday information brochure, it may add cost without much benefit.
6. Set Up the Artwork for Folding
Folded layouts need more care than flat ones. Common mistakes include text running across a fold, or panels that are all the same width when the fold requires one to be slightly narrower.
Before sending your file:
- Use the printer’s template for your chosen fold, as panel widths can differ.
- Keep text and key images away from fold lines and trim edges.
- Include bleed, usually 3 mm on each side.
- Use high-resolution images (at least 300 DPI) in CMYK colour.
- Proofread every panel, including phone numbers, URLs and prices.
Print a sample on an office printer, fold it by hand and read it as a customer would. This often reveals problems that are hard to spot on screen.
7. Allow Enough Lead Time
Folded brochures usually take a little longer to produce than flat flyers, because folding is an extra step. Lamination or foil stamping can add more working days.
Work backwards from the date you need the brochures, and leave time for design changes and proof approval. For trade fairs and launches, it is safer to have stock in hand a few days early.
8. Compare Suppliers on Clear Specifications
When choosing a printer, look for clear information on fold types, folded sizes, paper options and production time. Being able to see prices for different quantities helps you plan a realistic budget.
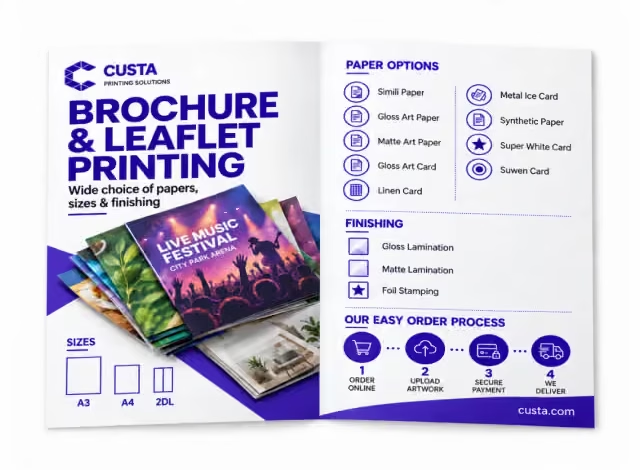
CUSTA, a Malaysian online printing and merchandise provider, offers six brochure fold styles with a range of papers and finishes, and shows the options for each fold on its product pages.
Conclusion
A good brochure starts with a clear purpose and a fold that matches how people will read it. Plan the content panel by panel, choose paper that suits the lifespan of the brochure and keep text away from fold lines.
When these details are right, your brochure is more likely to be read, kept and acted on.